


Safely and efficiently invite students into your Gamably experience using templates, manual entry & join codes.
Introduction
Adding players is one of the first and most important steps when setting up Gamably for your classroom or school. Gamably offers multiple ways to add players, allowing you to choose the method that best fits your workflow, class size, and privacy needs.
In this guide, you’ll learn how to add players in Gamably step-by-step using templates, manual entry, or join codes and links. We’ll also cover best practices for controlling who can join, so you can keep your classes secure and organized from the start.
Why Player Setup Matters
How players join your Gamably environment affects everything that follows — from class management to engagement and data tracking. A clear setup process helps you:
- Keep classes organized
- Control who can access your content
- Reduce setup time during peak periods
- Prevent unwanted or accidental sign-ups
- Support school or district privacy expectations
Gamably’s flexible player-adding options let you balance convenience with control.
Ways to Add Players in Gamably
Gamably provides three primary methods for adding players:
- Using our Google Sheet or CSV player template
- Adding players manually within the game
- Allowing players to join via a join code or join link (chosen during game creation)
Each method works best in different situations.
Method 1: Add Players Using a Template
Using a template is the fastest and most scalable option, especially for larger classes or schools.
Step 1 — Download the Player Template
Navigate to your class or group settings and download the provided player template.
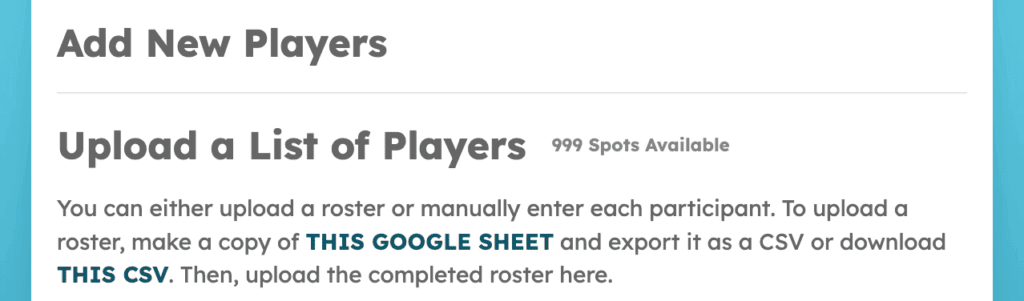
Step 2 — Fill Out the Template
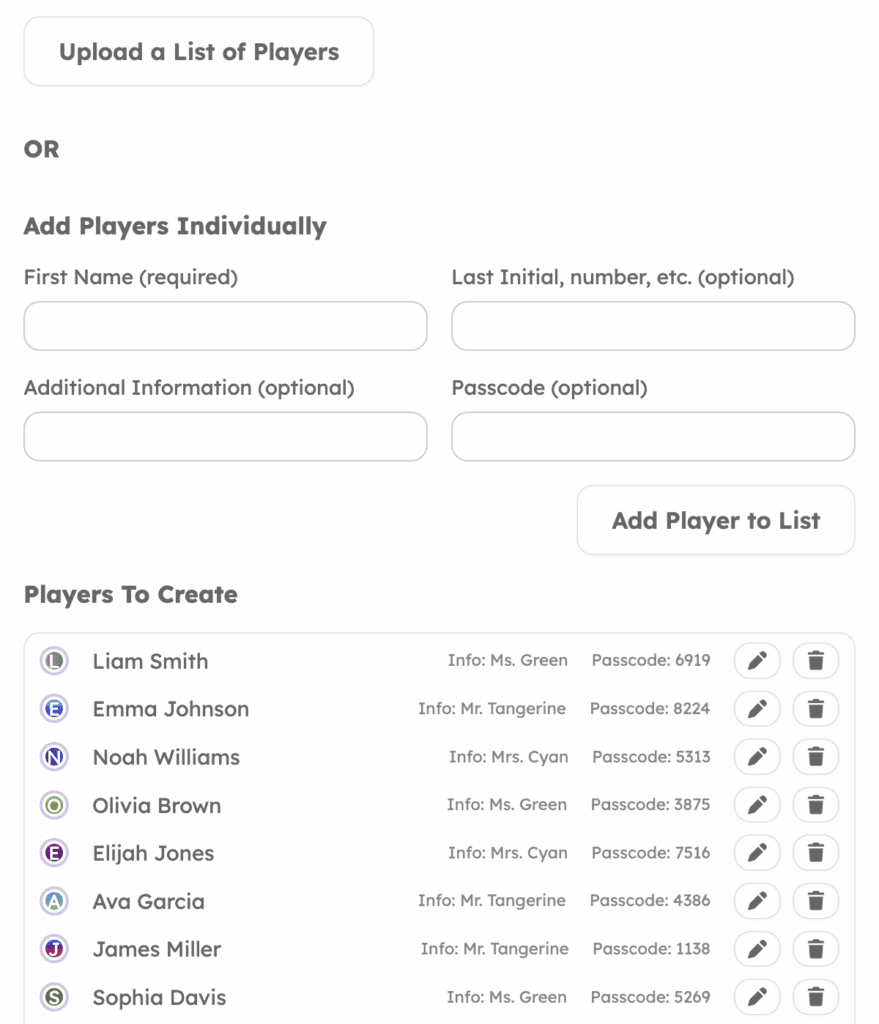
Open the template and enter player information such as names and other information (class, homeroom teacher, etc). Follow the format exactly to ensure a smooth upload.
Tip:
Templates work especially well when adding many players at once or importing data from an existing roster.
Step 3 — Upload the Completed Template
Upload the completed file back into Gamably. The system will automatically create player accounts for each entry using the data you entered into the spreadsheet.
When to Use Templates
Templates are ideal for:
- Large classes or multiple sections
- School-wide or grade-level onboarding
- Teachers who already have student rosters
- Minimizing manual data entry
Method 2: Add Players Manually
Manual entry gives you the most control over individual player details.
Step 1 — Open the Add Player Screen
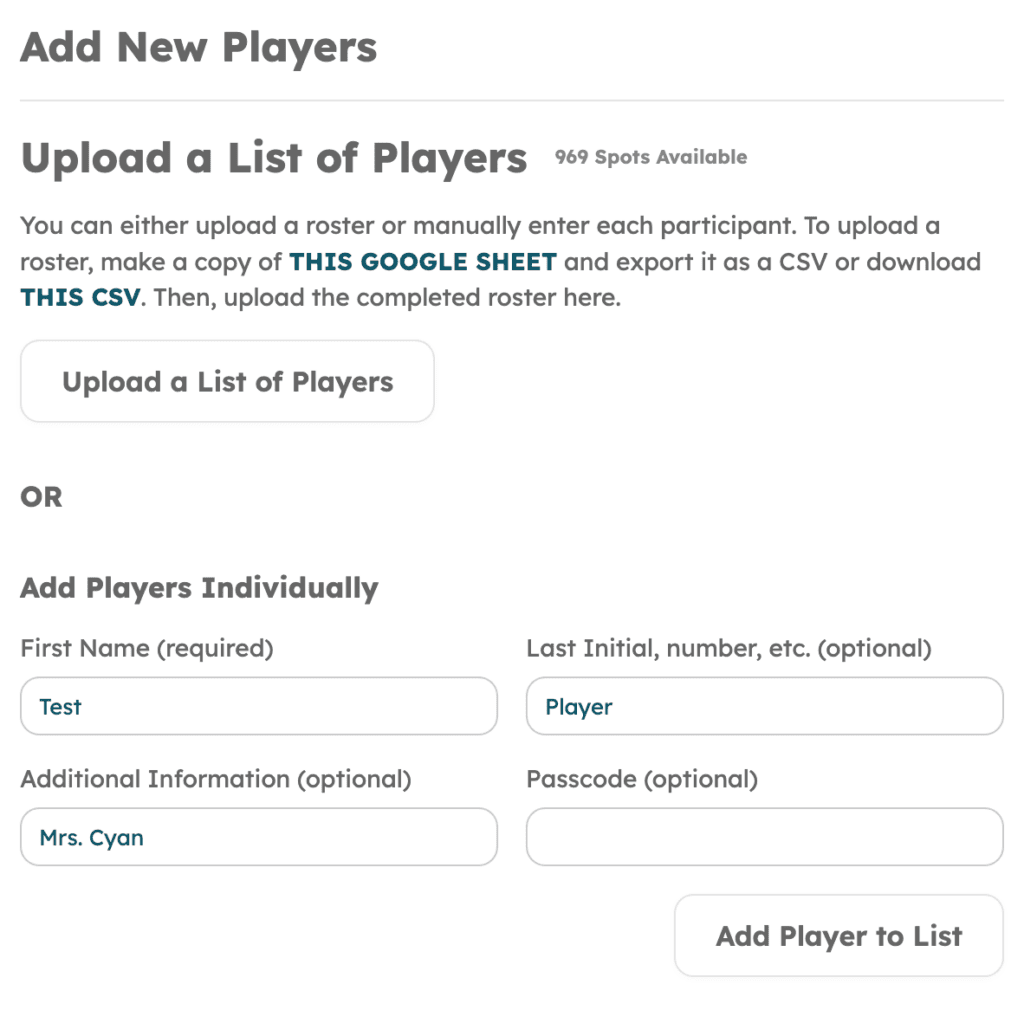
From your class or group dashboard, choose the option to add a player manually.
Step 2 — Enter Player Information
Fill in the required fields for each player. This method is best for adding a small number of students or making quick adjustments.
When to Use Manual Entry
Manual entry works well for:
- Small classes
- Adding late-joining students
- Testing or demo environments
- Making corrections or updates
Method 3: Add Players Using a Join Code or Join Link
Join codes and links allow players to add themselves, making onboarding fast and easy.
Step 1 — Generate a Join Code or Link
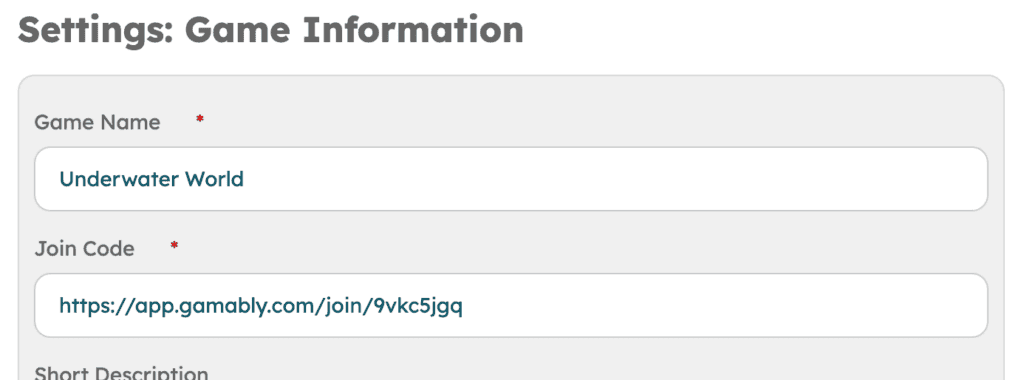
From your Game Settings: Rostering, select “Players can join with their Google, Microsoft or Email accounts using the join code or enroll link.”
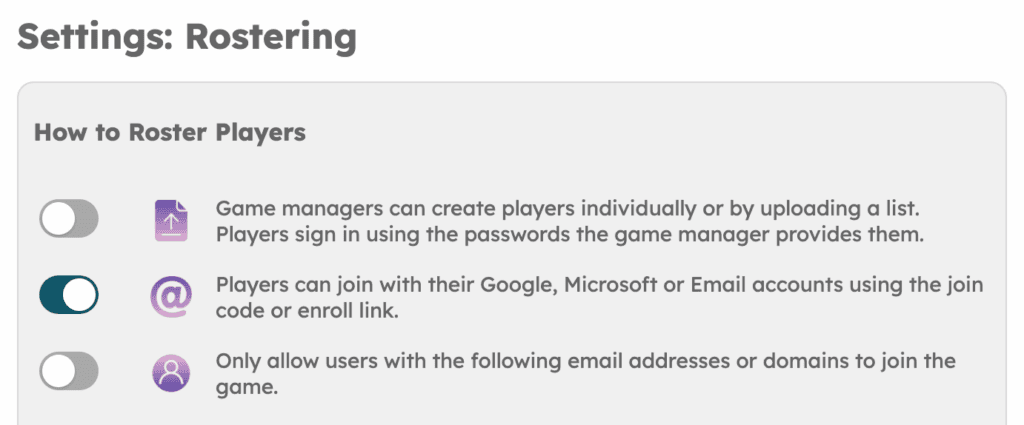
Afterwards, double check what your join code is under Game Settings: Information. You will see a Join Code generated underneath the Game Name.
Step 2 — Set Joining Restrictions (Strongly Recommended)
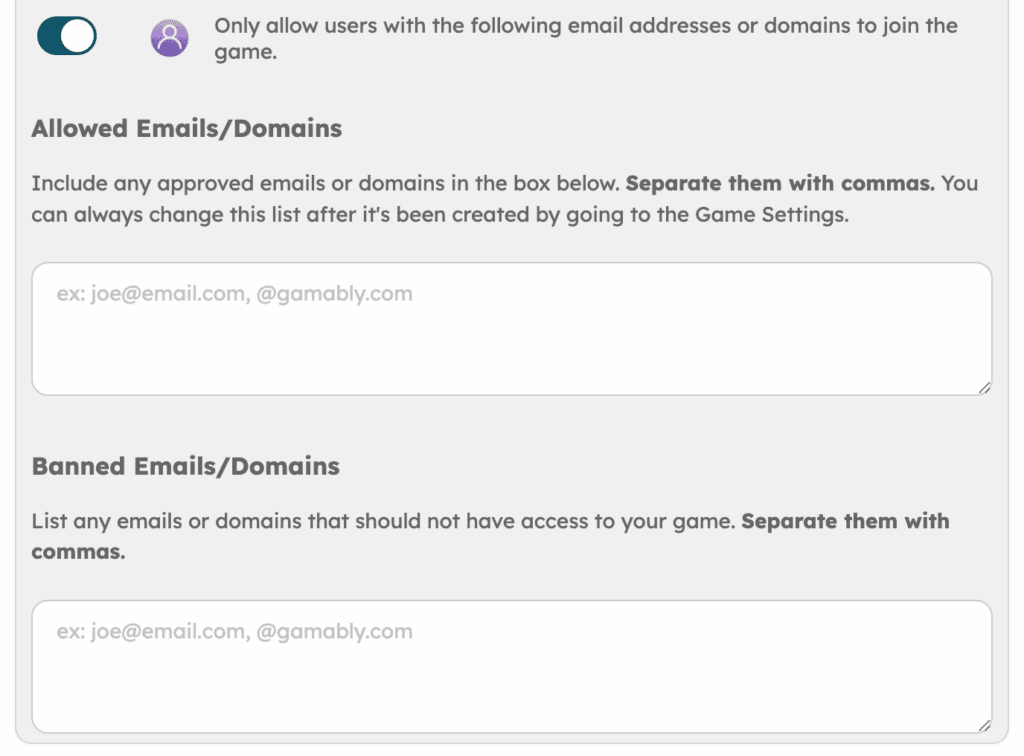
Before sharing the code or link, you can limit who is allowed to join by:
- Requiring specific email addresses
- Restricting sign-ups to approved email domains
- Restricting sign-ups by removing emails address or domains
Step 3 — Share the Code or Link
Share the join code or link with your students through your LMS, email, or classroom platform.
Important Security Recommendation
While Gamably allows you to ban or remove players later, leaving a join code or link completely open is not recommended.
Best practice is to always apply at least one restriction, such as:
- Approved email domains
- Specific email addresses
This helps prevent accidental or unauthorized sign-ups and keeps your classroom environment safe and organized.
Choosing the Right Player-Adding Method
| Situation | Recommended Method |
|---|---|
| Large class or multiple sections | Template upload |
| Small class or individual additions | Manual entry |
| Fast onboarding with student self-signup | Join code or link (with restrictions) |
| School or district environment | Template or restricted join link |
Managing Players After They Join
Once players are added, you can still manage access and behavior by:
- Removing players from a class
- Banning specific players or email addresses
- Editing player details
- Moving players between groups or classes
Gamably gives you flexibility even after onboarding is complete.
Common Mistakes to Avoid
- Sharing an unrestricted join link publicly
- Forgetting to apply email or domain limits
- Using manual entry for large rosters
- Not reviewing player lists after onboarding
- Assuming all classes need the same setup method
A few minutes of setup can save hours of cleanup later.
Frequently Asked Questions
Can I change how players join after I’ve already started?
Yes. You can switch between methods or disable join codes at any time.
What happens if someone joins by mistake?
You can remove or ban players at any time from the players menu.
Can I use different methods for different classes?
Absolutely. Each class or group can use the method that fits best.
Do players need email addresses to join?
Email requirements depend on how you configure your join settings.
Conclusion
Gamably gives you multiple ways to add players so you can choose the approach that fits your classroom, school, or teaching style. Whether you prefer structured templates, hands-on manual entry, or fast join codes, you stay in control of who joins and how they access your content.
By applying simple restrictions and choosing the right onboarding method, you can create a smooth, secure, and stress-free setup for both you and your students.
Next Steps (Internal Links)
👉 How to Distribute Rewards in Gamably
👉 Teams in Gamably
👉 How to Use Gamably

View comments
+ Leave a comment